Creating a New Appointment
This guide will walk you through creating your first appointment in OpenEMR.
Prerequisites
Before you begin, ensure that you have:
- User, e.g. doctor, with permissions to schedule an appointment
- Provider/user that is scheduleable to the facility (this entity can be same as above)
- One patient to schedule the appointment on
Creating a New Appointment
Step 1 - Open the Calendar
After logging in to your clinic, click on the calendar view.
Step 2 - Navigating the Screen
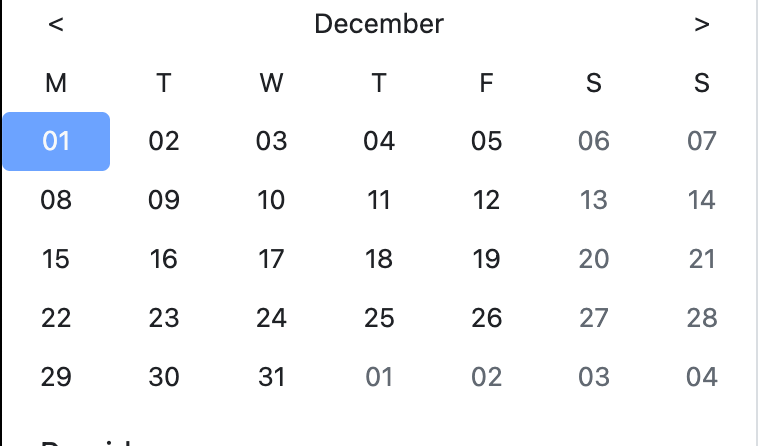
Day of the Month
The upper left portion of the screen shows the current month being displayed. You can click the left and right arrows on either side of the month to move forward and backward in time. You can also click on the month to bring up a scroll view to quickly move to a month.
TIP - Date Checking
You can make changes to events that have happened in the past, so any date is valid when you are creating appointments in the system.
Left Side Menu Controls
Clicking on the three line button (far left in the image below) will show / collapse the side menu that shows the calendar and list of providers. The + button will bring up the menu to add a new patient / provider. Clicking the magnifiying glass will allow you to search the calendar. Clicking Today moves the calendar view to Today.

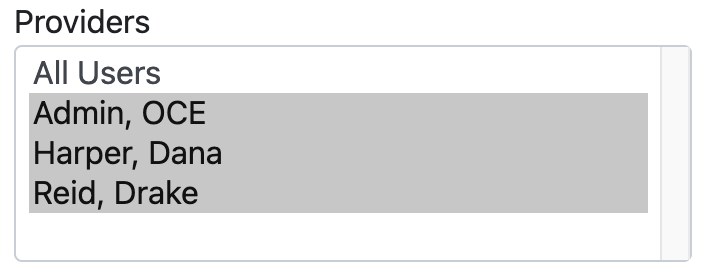
Providers
Under the calendar is the list of providers that you can schedule. You can select All Users to show all available providers at your practice or an individual doctor, physicians assistant, or nurse practitioner.
Calender View
You can see who is in the office and when they are working. As you can see in the image below, Dr. Harper arrives on Monday, December 1st at noon, while Dr. Reid arrives at 8:00 am.
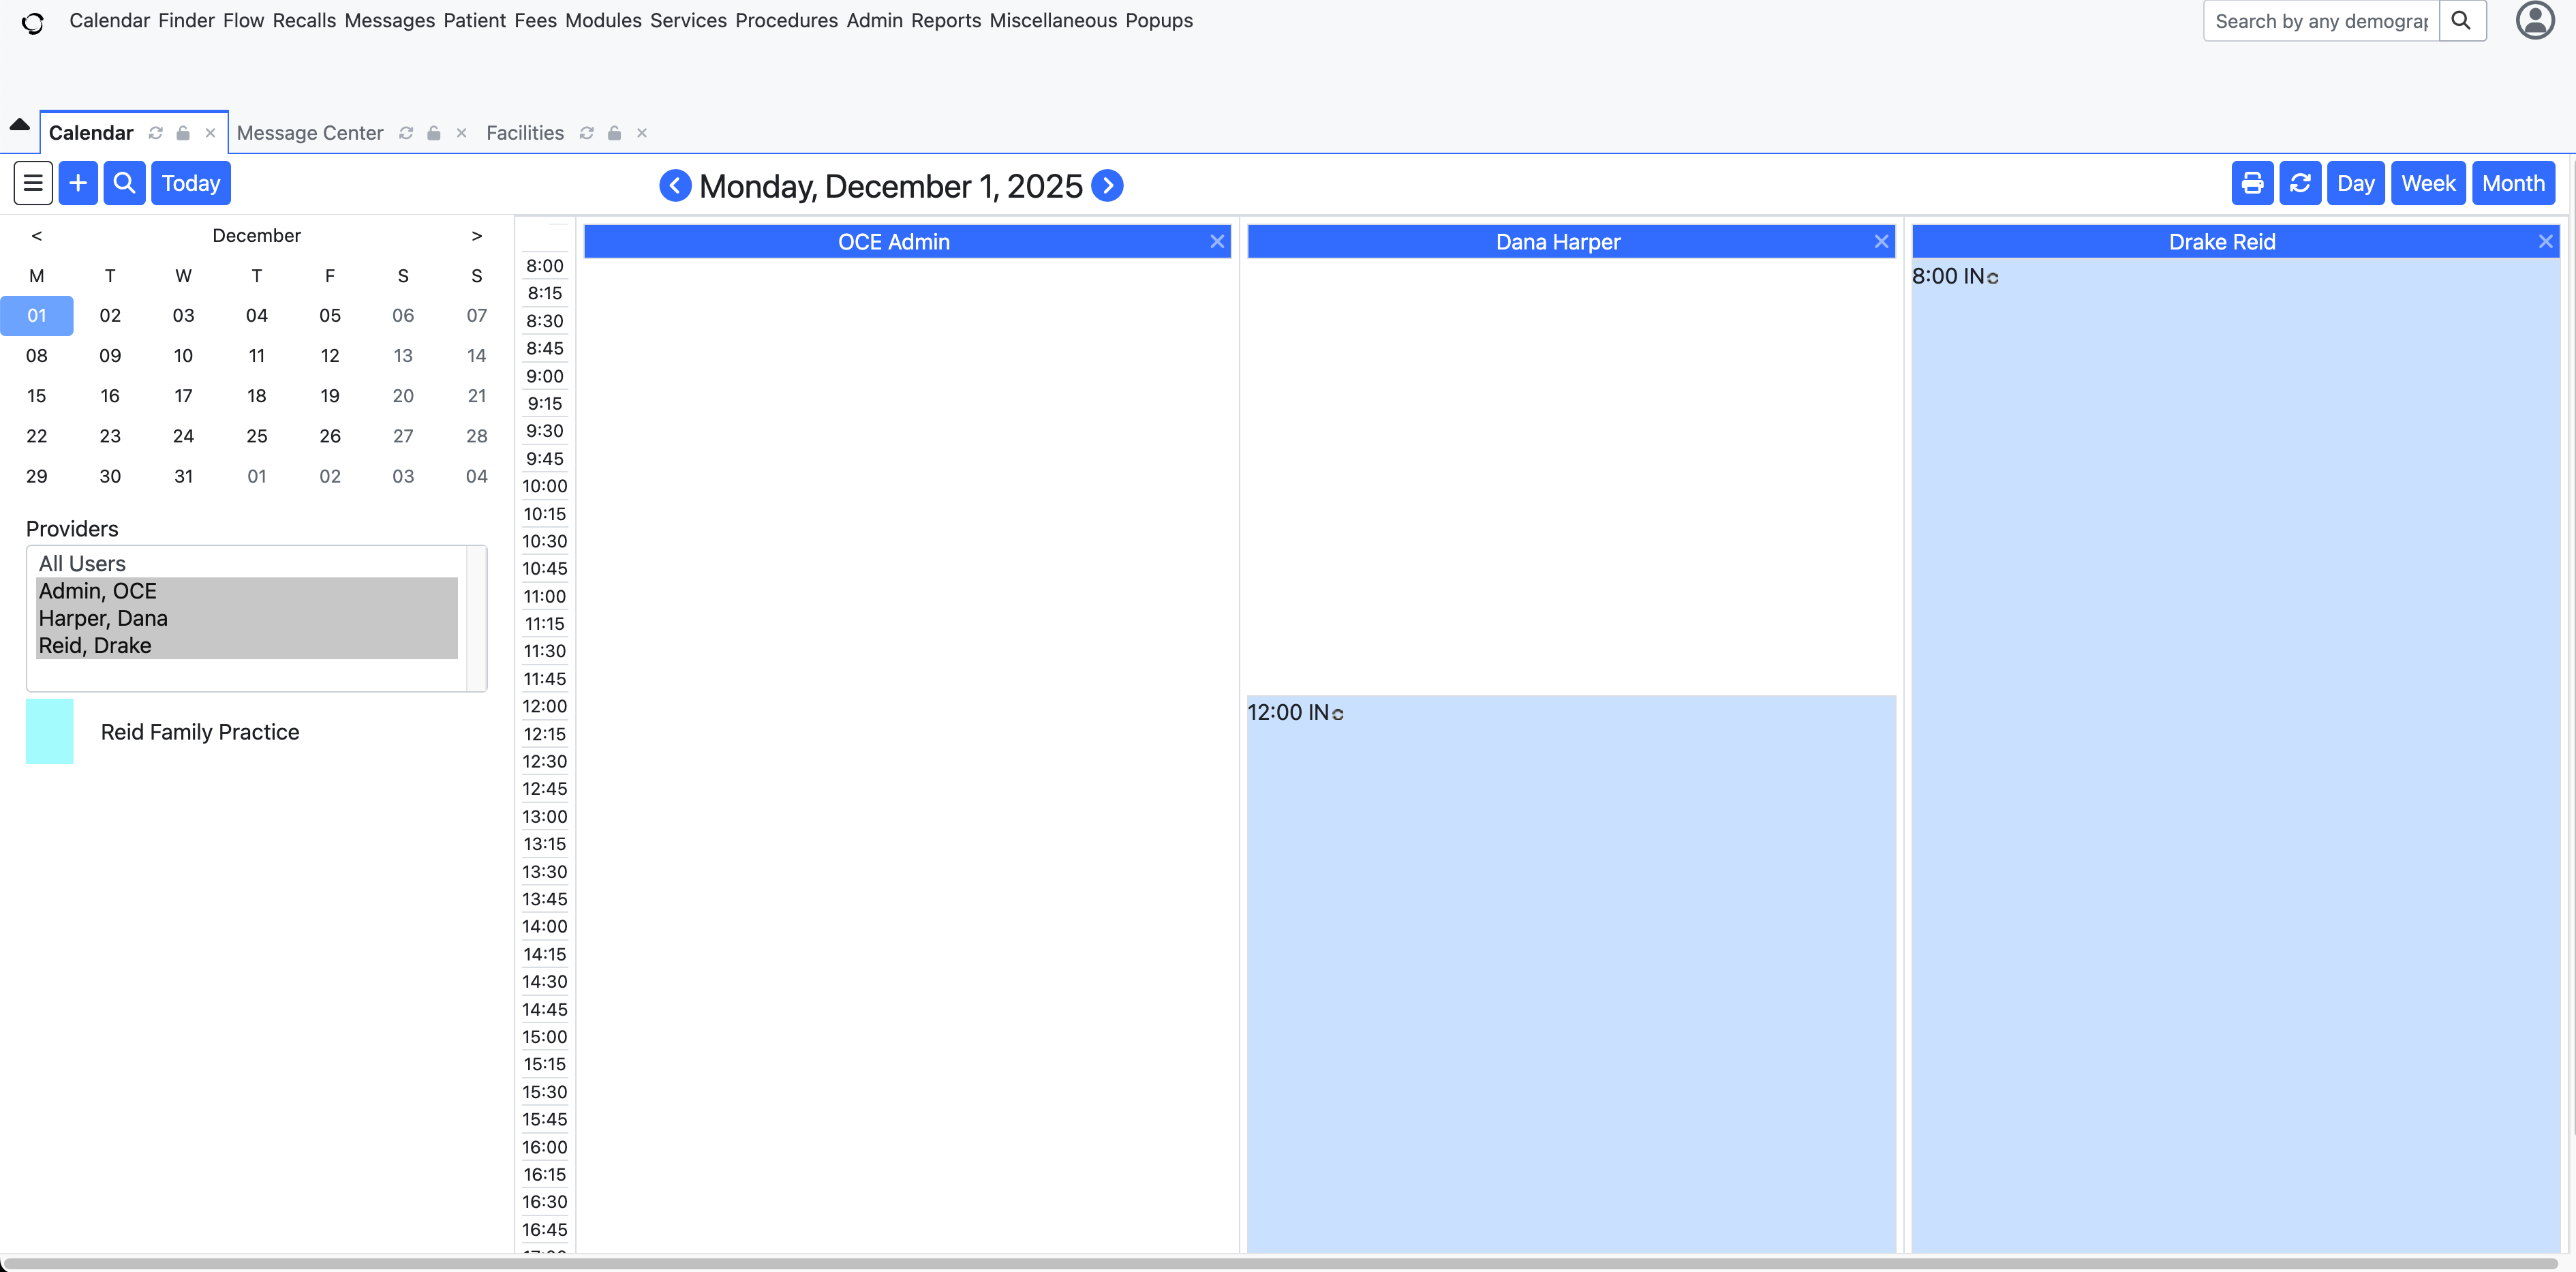
Right Side Menu Controls
On the right side of the screen you will find five buttons for navigating the screen. The first icon will bring up a Print menu. The Refresh button will update the screen. The Day, Week, and Month buttons will toggle three different views of the Calendar.

Step 3 - Making the Appointment
You can make a new Appointment in two ways from this screen. The first is to click on the + button from the left side controls. The second is to click on an open spot on the calendar. Both options will launch a pop up that looks like the one below.
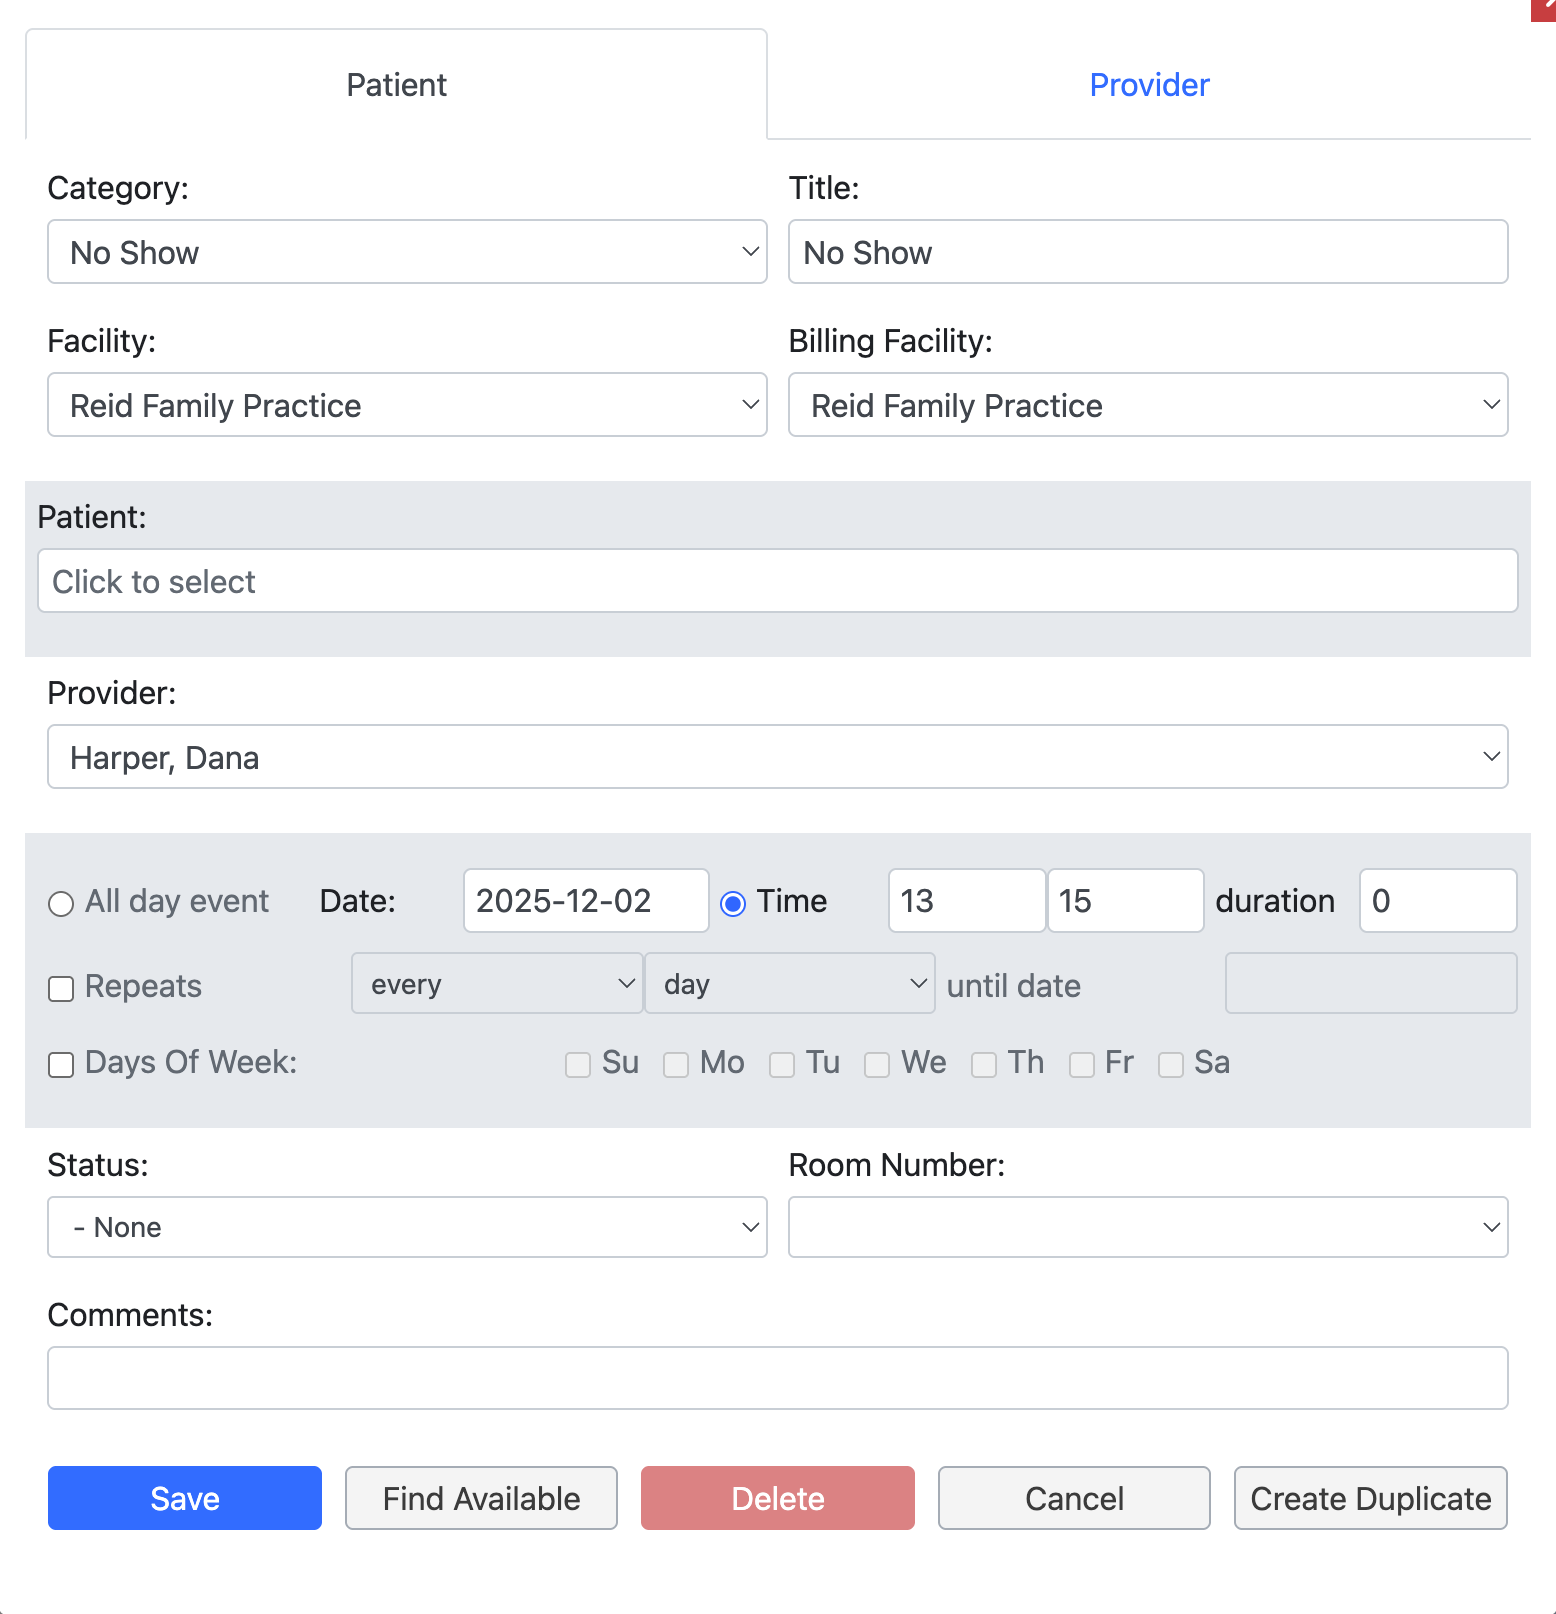
Category
There are six default options for the category for the appointment:
- No Show - The patient did not show up for their appointment
- Office Visit - A general office visit / standard appointment
- Established Patient - A routine follow up for an existing patient
- New Patient - A patients first visit with the practice
- Health and Behavioral Assessment - Integrated care evaluating behavioral, emotional, social, and/or pyschological factors
- Preventive Care Services- Healthcare screenings to detect conditions early, promote healthy behaviors, or reduce the risk of illness
- Ophthalmological Services - An eye, vision, or visual system
See Customizing Appointment Categories to modify and update the appointment categories.
Title
The Title field allows you to display something other than the category on the calendar if you wish.
Facility
If you have more than one action in the system, you can select the facility where the appointment will be held.
Billing Facility
Which facility is responsible for handling the billing for this appointment.
Patient
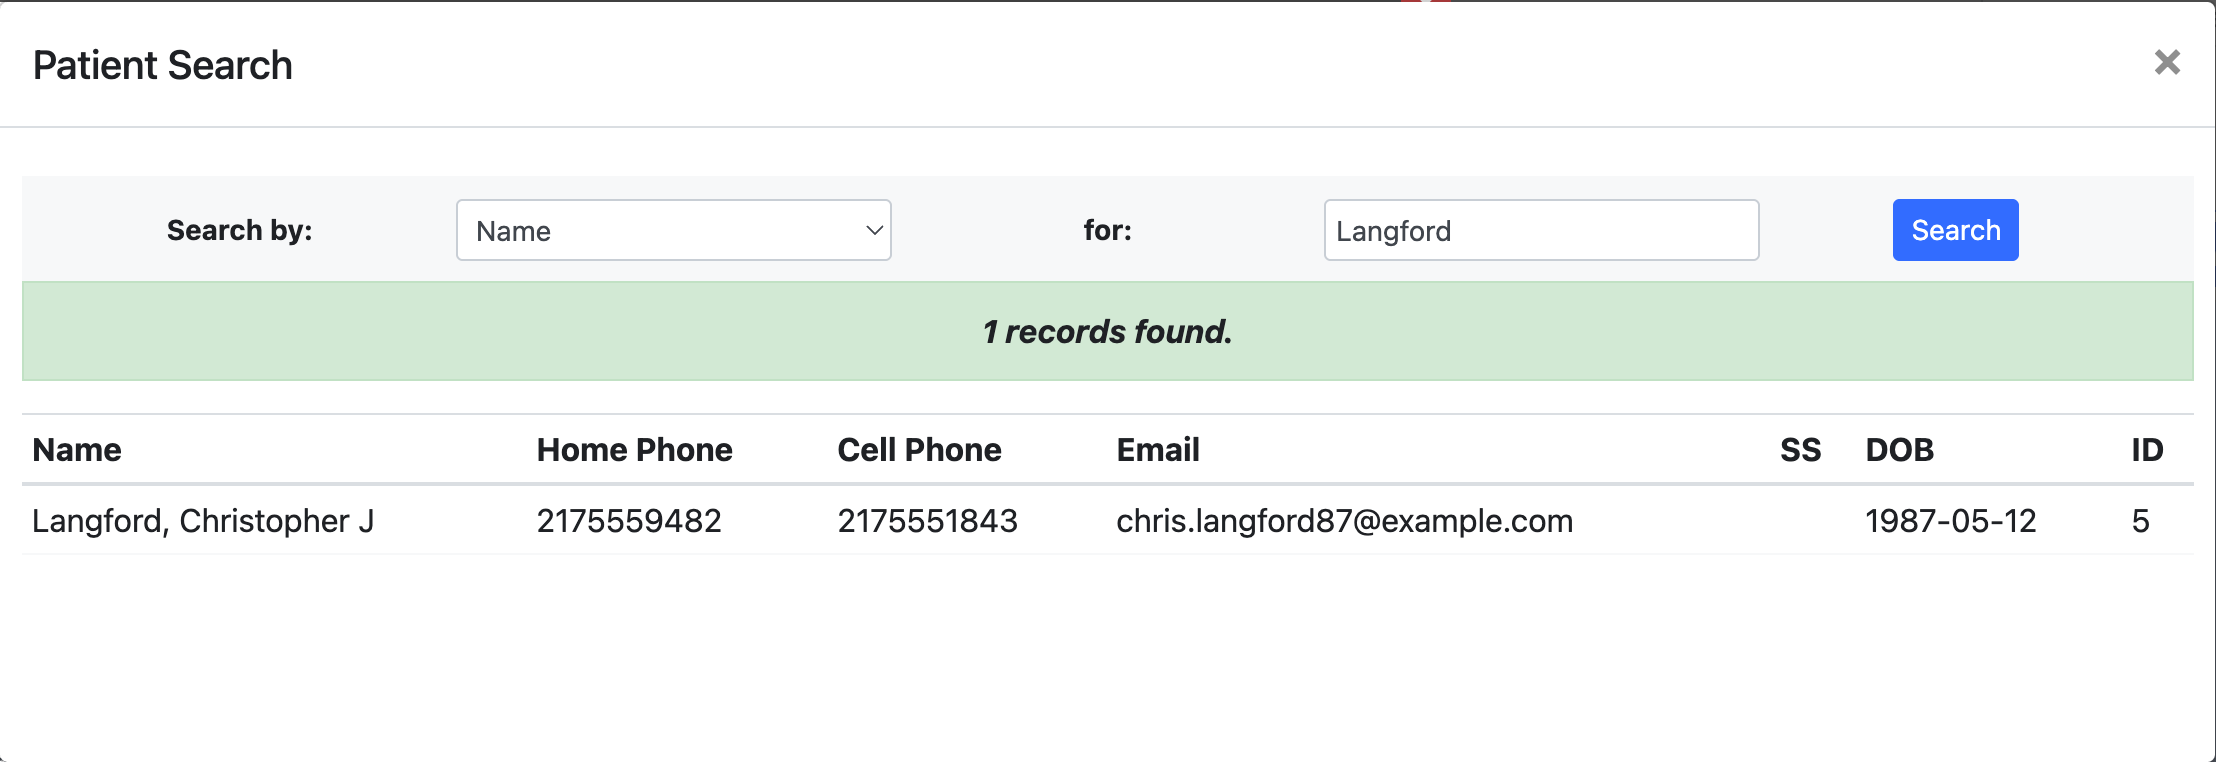
This is a drop down menu. When you click in it, a search box appears to allow you to find the patient you are making an appointment for. If no patient is found as you search, the system will prompt you to enter a new patient record.

Apointment Time
Appointments can either be for a single time, an all day event, or a repeating event. If you select a repeating event, you need to enter the end date for the repetition. The appointment category will automatically update the duration field.
Status
An appointment can have several status information selected
- Reminder Done - We have contacted the patient and sent a reminder
- Chart Pulled - The patient's chart is pulled and ready for the appointment
- Cancelled - Either we or the patient have cancelled the appointment
- No Show - The patient did not show for the appointment
- Arrived Late - The patient arrived for their appointment, but arrived after the appointed time
- Left w/o Visit - The patient arrived for their appointment, but left before seeing the provider
- Ins / Fin Issue- There is an insurance or financial with the patient
- In Exam Room- The patient is in one of the examination rooms
- Checked Out - The patient visit is over and the patient has checked out
- Coding Done - Medical coding for the visit is complete for insurance purposes
- Cancelled < 24h - The patient cancelled the appointment, but inside the 24 hour courtesy window
- Pending - The appointment is set, but unconfirmed
- AVM Confirmed - Automated voice message confirmed
- SMS Confirmed - The patient's SMS number is confirmed for sending appointment updates via SMS
- EMAIL Confirmed - The patient's email is confirmed
- Callback Requested - The patient has requested a callback from the provider
Room
If your clinic has multiple examination rooms, you can select which room the patient is in via this field.
Comments
A simple text field for capturing any notes about the appointment.
Organization Buttons
- Save - Save the appointment to the system
- Find Available - Allow the system to find the first available appointment for the selected provider
- Delete- Delete the appointment from the system
- Cancel - Stop the entry of the new appointment
- Create Duplicate - Duplicate an existing appointment