Uploading a Document to a Patient's Dashboard
This guide outlines the process for uploading external files, such as lab results, imaging reports, or scanned documents, directly into a patient's dashboard in OpenEMR.
Prerequisites
- Admin access to OpenEMR
- An active patient inside OpenEMR
- A document to uload
Step 1: Open the Patient's Dashboard
Open the dashboard for the patient you want to work with. You can find a patient by using the search bar at the top of the screen or finder in the main menu.

Step 2: Navigate to the Documents Section
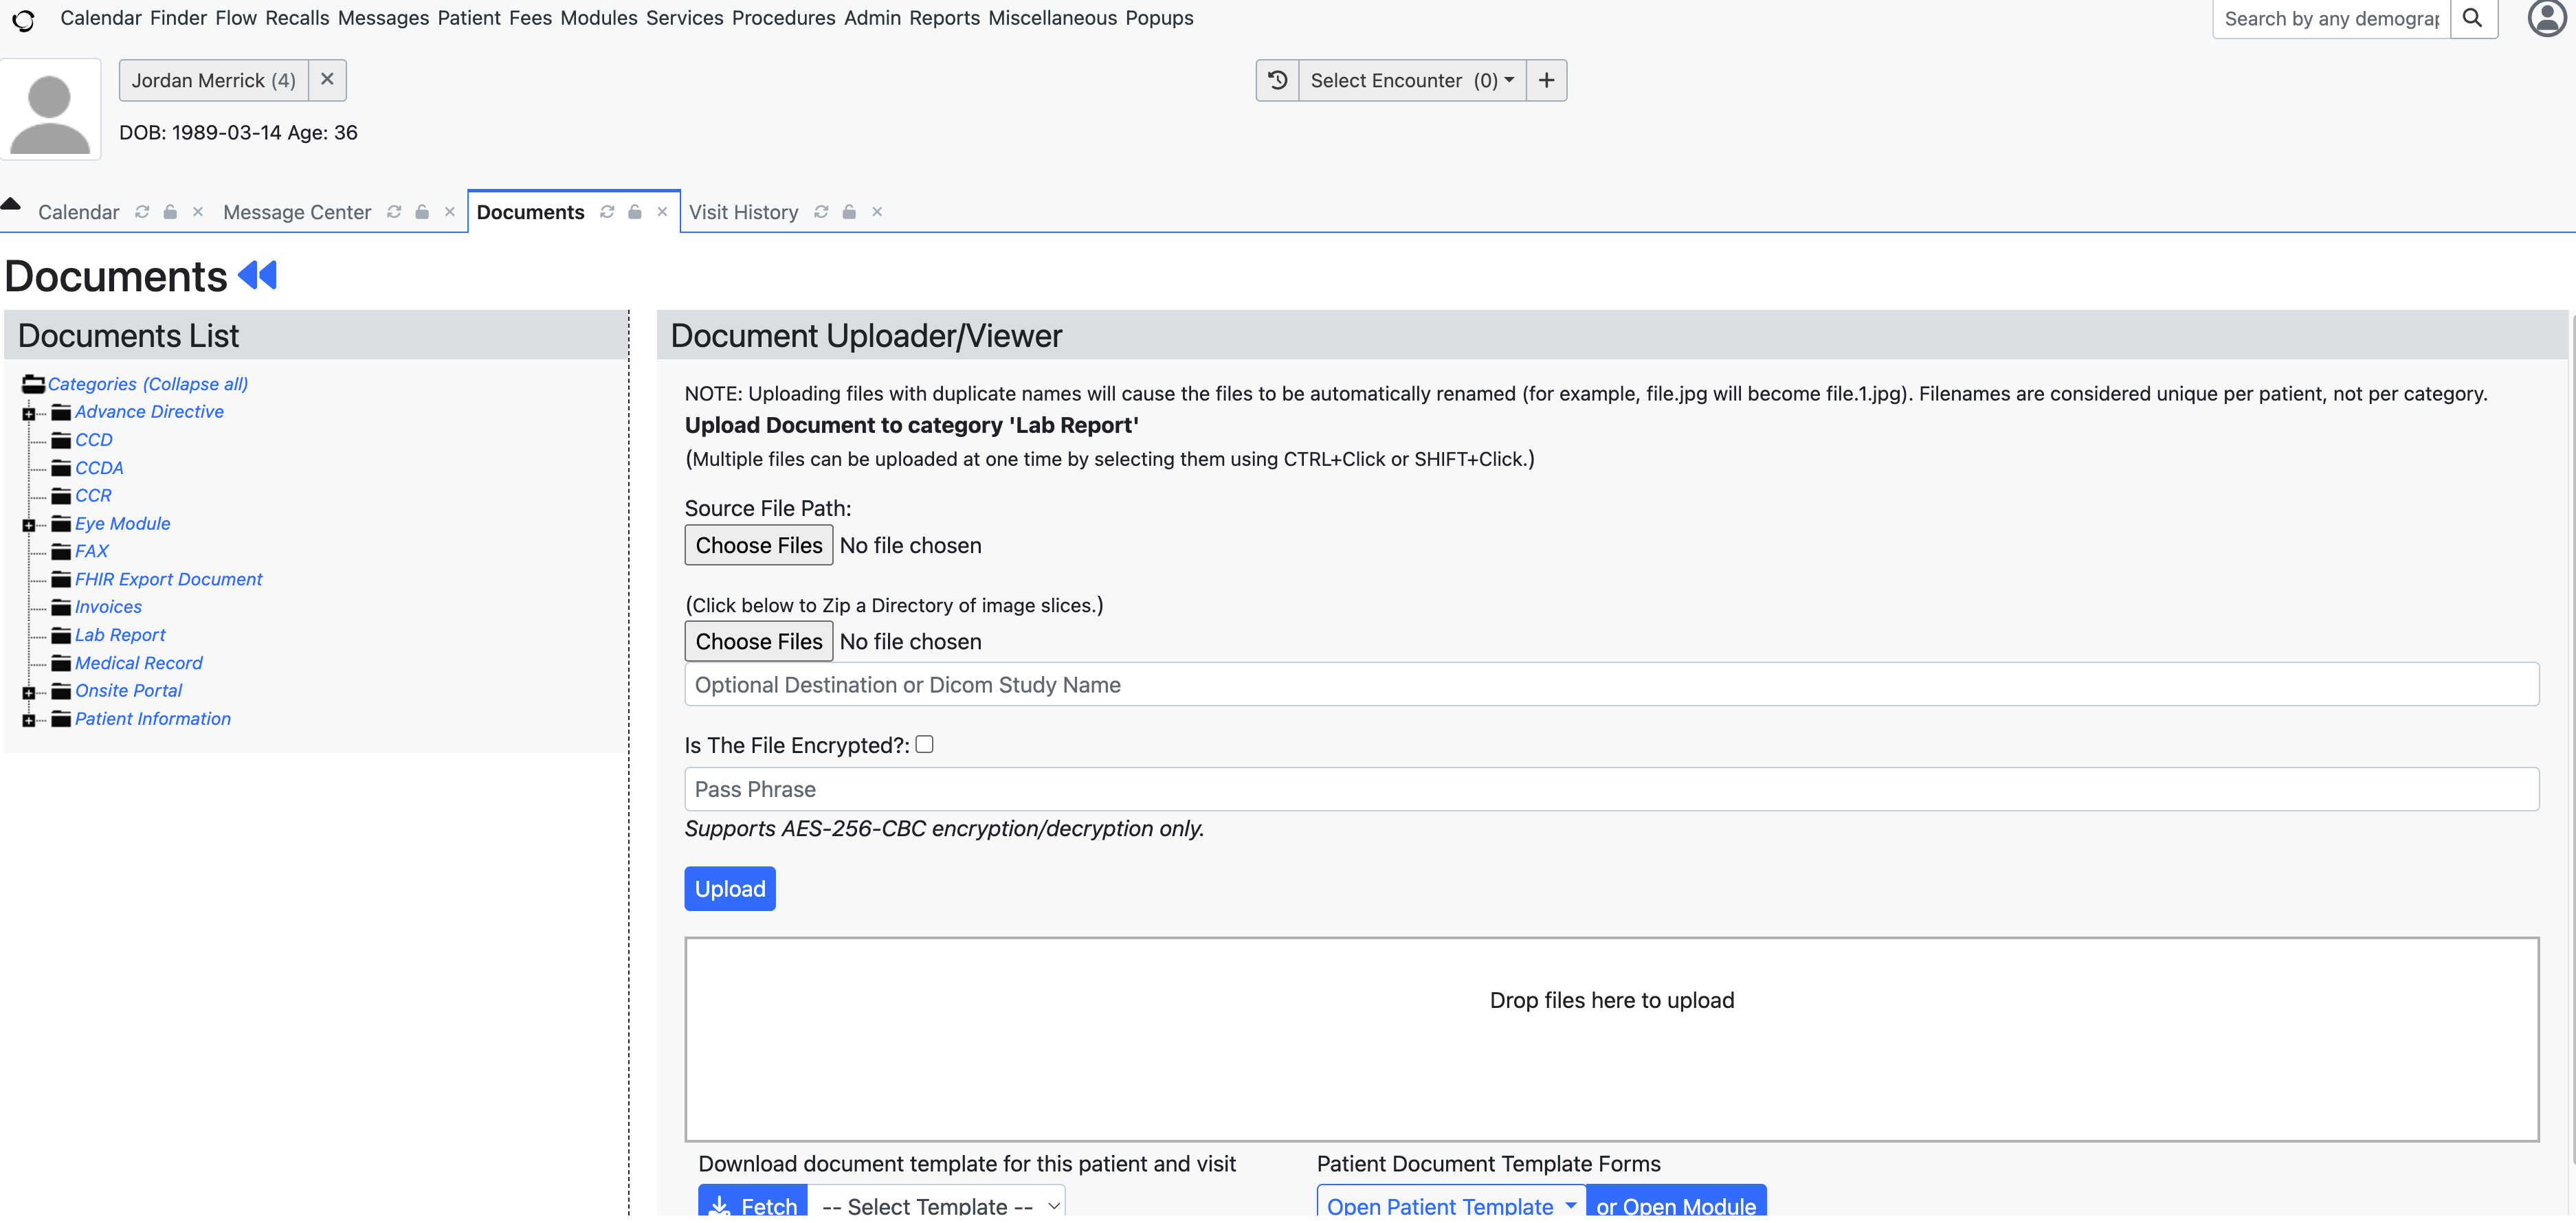
Once you are in the patient's dashboard, you will manage their documents in a specific section.
- From the patient's dashboard, look for the Documents tab or section.
- Click on it to open the patient's document repository.
Step 3: Upload the File
The documents screen allows you to upload new files.
- Select a category for the file upload, for example, "Lab Report."
- Upload files to that destination by selecting or dragging a file into the "Drop files here to upload" box.
- The file will then be uploaded and attached to the patient's dashboard.
The document is now visible in the patient's document list and can be viewed at any time by authorized users. Patients will also be able to see these documents in their patient portal.